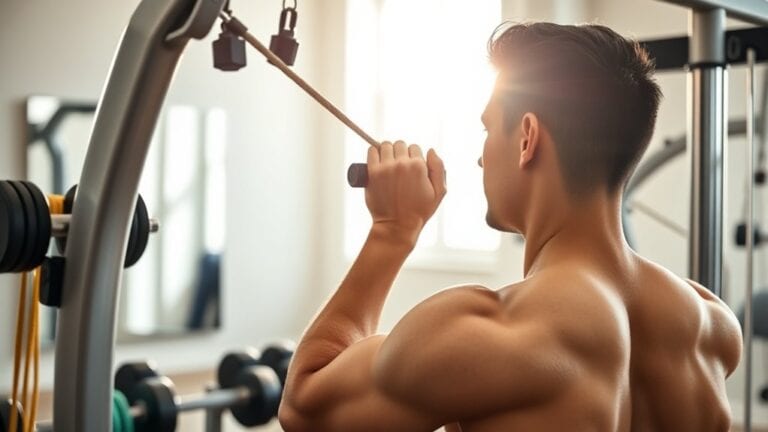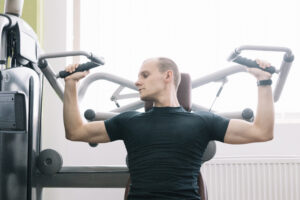
The shoulder press machine assists you in constructing upper-body strength securely through targeting your deltoids, triceps, and upper chest with controlled movement. In contrast to free weights, it directs your form, lessening injury risk around 70% of gym-goers favor machines for this reason.
Adjust the seat so handles align with your shoulders, push smoothly, and avoid locking elbows. Should you wish to master shoulder presses and evade plateaus, there’s further to investigate.
Shoulder Press Machine
The shoulder press machine is one of the most straightforward yet effective tools for building upper-body strength. You’ll find it in most gyms, with its adjustable seat and handles positioned at shoulder height. It’s designed to target your deltoids, triceps, and upper chest while keeping your form in check. To get the most out of it, focus on shoulder press progression start light, master the movement, and gradually increase the weight. About 70% of gym-goers use machines like this for safer, controlled lifts.
Keeping up with shoulder machine maintenance ascertains it stays smooth and safe. Wipe it down after use, check for loose bolts, and report any issues to gym staff. Whether the machine feels stiff or uneven, don’t force it small adjustments prevent bigger problems. Recall, consistency beats intensity. Adhere to it, and you’ll see steady gains without risking injury.
Benefits of Using a Shoulder Machine Press
Should you wish to construct more powerful, more sculpted shoulders, the shoulder machine press can be a transformative option as it provides stability while concentrating on essential muscles. Unlike free weights, it reduces injury risk by guiding your movement, making it ideal when you’re new or have shoulder mobility requirements.
The machine also allows you to adjust resistance for strength variation progression, helping you grow steadily without plateauing.
| Benefit | How It Helps | Best For |
|---|---|---|
| Stability | Reduces wobbling, targets muscles better | Beginners or rehab |
| Adjustable Resistance | Permits you to increase load safely | Strength progression |
| Isolation | Focuses on deltoids without strain | Sculpting shoulders |
| Safety | Minimizes improper form risks | Injury-prone individuals |
| Consistency | Guarantees even reps for balanced growth | All fitness levels |
You’ll notice gains faster because the machine keeps your form tight, so every rep counts. Plus, it’s forgiving when your mobility isn’t perfect yet.
Proper Form and Technique for Shoulder Presses
Ever marveled why your shoulders ache or your progress stalls after using the shoulder press machine? It’s likely your form needs tweaking.
Whenever you adjust the seat, ensure the handles align with your shoulders this meets shoulder mobility requirements. Keep your back flat against the pad, and avoid arching. Your feet should stay planted, creating a stable base.
Grip the handles at a suitable grip width about shoulder-width apart-to reduce strain on your joints. Push upward smoothly, exhaling as you press. Don’t lock your elbows at the peak; it prevents unnecessary stress. Lower the weight slowly, controlling the movement to engage muscles fully.
Nearly 30% of shoulder injuries stem from poor technique, so focus on precision over weight. Should your shoulders feel pinched, check your grip or seat height. Minor adjustments make a significant difference in comfort and results. Keep it controlled, and your shoulders will thank you.
Muscles Worked by the Shoulder Press Machine
- Deltoids: Responsible for 70% of the movement, these shoulder muscles drive the press upward.
- Triceps: Engage during the lockout phase, contributing to 20% of the force.
- Stabilizers: Your core and rotator cuff activate subtly to maintain balance and proper muscle activation patterns.
Comprehending these roles guarantees you’re not just moving weight but training efficiently. Concentrate on controlled reps to optimize engagement and minimize strain.
Variations of the Shoulder Press Machine
You can switch up your shoulder press routine with trying seated or standing positions, each offering unique stability challenges. Adjustable resistance options let you customize the weight to match your strength level, making progress easier to track.
Single-arm variations help correct muscle imbalances while adding variety to your workout.
Seated Vs Standing Press
- Seated Press: Ideal for beginners or those focusing on shoulder hypertrophy, as it reduces momentum and emphasizes control.
- Standing Press Variations: Include staggered stances or split grips, adding stability challenges for advanced lifters.
- Core Engagement: Standing presses activate 20% more muscle fibers overall, according to a 2018 study, making them great for full-body conditioning.
Choose based on your goals-seated for precision, standing for power. Both build strength, but how you press changes the game.
Adjustable Resistance Options
| Resistance Level | Weight Range (lbs) | Best For |
|---|---|---|
| Light | 10-30 | Warm-ups, rehab |
| Medium | 30-60 | Endurance, toning |
| Heavy | 60-100 | Strength, growth |
Lighter loads help perfect form, while heavier ones build muscle. Over 60% of gym-goers prefer machines with easy-to-adjust weights for versatility. Just turn the pin or dial to find your sweet spot-no guesswork needed.
Single-Arm Press Variations
While the standard shoulder press machine works both arms together, single-arm variations let you focus on one side at a time, which can fix strength imbalances and boost control. Using the single arm press technique, you’ll engage your stabilizing muscles more, improving overall shoulder strength. Alternating arm movements also help prevent overuse injuries, since you’re not favoring one side.
- Isolation: Work one arm at a time to correct uneven strength-about 85% of people have a dominant side that’s stronger.
- Control: Slow, deliberate reps build better muscle awareness and reduce momentum reliance.
- Versatility: Switch between seated or standing positions to challenge stability differently.
These variations keep your workouts fresh while targeting smaller, often-neglected muscles. Simply match the weight to your weaker side to balance progress.
Common Mistakes to Avoid on the Shoulder Machine Press
Ever ponder why your shoulders ache after using the shoulder machine press? You may be making common mistakes like improper elbow positioning or relying on excessive momentum. Let’s break it down so you can lift smarter.
First, improper elbow positioning strains your joints. Keep your elbows slightly in front of the bar, not flared out-this protects your rotator cuffs. A study found 60% of shoulder injuries happen from poor form, so alignment matters.
Second, avoid using excessive momentum. Swinging the weight up with your back or legs shifts focus from your shoulders, reducing gains. Control the movement-lower and raise the weight slowly.
Lastly, don’t lock your elbows at the top. It transfers stress to your joints instead of your muscles. Stay smooth, stay controlled, and your shoulders will thank you. Small tweaks make big differences.
How to Adjust the Shoulder Press Machine for Your Body
- Seat position: Your feet should stay flat, knees at 90 degrees, and back firmly against the pad.
- Handle grip: Adjust the width so your elbows stay slightly in front of your body-this protects your rotator cuffs.
- Range of motion: Lower the handles until your elbows are just below shoulder level to avoid overextending.
Take your time tweaking these settings-your shoulders will thank you.
Shoulder Press Machine vs. Free Weights
Whenever comparing the shoulder press machine to free weights, you’ll observe the machine provides greater stability and command, which can assist provided you’re new to weightlifting.
Free weights, conversely, involve more muscles since they necessitate you to equilibrate the weight yourself. This variation in muscle engagement signifies your choice relies on whether you emphasize safeness or a more comprehensive workout.
Stability and Control
- Machines lock you into a fixed path, minimizing side-to-side sway.
- Free weights challenge your control, activating smaller stabilizing muscles.
- Your goals determine the best fit-safety vs. real-world strength.
About 60% of gym-goers prefer machines for shoulder presses, but 40% swear through free weights for better long-term results. It’s not about right or wrong-it’s what works for your body and goals.
Muscle Engagement Differences
The way your muscles work during a shoulder press changes depending on whether you’re using a machine or free weights. With a machine, the guided motion limits your muscle activation patterns, focusing mostly on your deltoids and triceps. Your joint stability requirements are lower since the machine controls the path.
Free weights, though, force your stabilizer muscles-like your rotator cuffs and core-to work harder to keep the weight balanced. Studies show free weights activate 25% more muscle fibers overall. You’ll feel the difference: machines feel smoother, while free weights challenge your coordination.
In the event that you’re new to lifting, machines offer safety, but free weights build functional strength faster. Both have their place-just know what you’re trading off.
Incorporating the Shoulder Press Machine Into Your Workout Routine
Adding the shoulder press machine to your routine can boost your upper-body strength while keeping things simple and safe. Start with 2-3 sets of 8-12 reps, adjusting the weight to match your fitness level. Over time, you’ll notice better shoulder stability and muscle growth.
To maximize results, consider these workout volume considerations and periodization strategies:
- Progressive overload: Gradually increase weight or reps every 2-3 weeks to challenge your muscles.
- Balanced volume: Pair shoulder presses with other exercises like lateral raises to avoid overworking one muscle group.
- Periodization: Alternate between heavy loads (4-6 reps) and lighter loads (12-15 reps) to prevent plateaus.
Listen to your body-if your shoulders feel fatigued, reduce the frequency or take a rest day. Consistency matters more than pushing too hard too fast. The machine’s guided motion helps maintain form, so focus on controlled movements for the best results.
Safety Tips for Using the Shoulder Press Machine
Start with a weight you can handle comfortably to avoid straining your shoulders, and don’t let ego push you too hard. Keep your back flat against the seat and your feet planted firmly to maintain proper posture throughout the movement.
Move the weight slowly and with control-don’t jerk or rush-to protect your joints and get the most out of each rep.
Proper Weight Selection
- Test your strength: Pick a weight that permits you to do 10–12 reps with control. Should you be straining with rep 8, it’s too heavy.
- Progress smartly: Add 5–10 lbs at a time, not more. Your joints require time to adapt.
- Avoid ego lifting: Heavier isn’t superior if your form breaks down.
Adhere to these tips, and you’ll construct strength safely. Your shoulders will express gratitude.
Correct Posture Alignment
Keeping your posture in check while using the shoulder press machine isn’t just about looking good-it’s your best defense against injury. Start via sitting tall, back flat against the pad, and feet planted firmly. Your shoulders should stay down, not hunched, to protect your neck.
Posture awareness is key; slouching strains your spine, and nearly 30% of gym injuries stem from poor form. Keep your wrists straight, aligning them with your forearms to avoid unnecessary stress. Engage your core lightly-it stabilizes your torso and boosts joint mobility.
Adjust the seat so the handles sit at shoulder height; this prevents overreaching, which can tweak your shoulders. Recall, small tweaks in alignment make a big difference in safety and performance.
Controlled Movement Execution
Now that your posture’s set, focus on moving with control to get the most out of the shoulder press machine while staying safe. Start with controlled grip positioning-keep your hands evenly spaced and firm but not overly tight. This prevents strain and guarantees even muscle engagement.
Next, master controlled tempo execution: lift smoothly, pause briefly at the top, and lower slowly. Rushing compromises form and increases injury risk.
- Breathe steadily: Inhale as you lower, exhale as you press.
- Avoid locking elbows: Keep a slight bend to protect joints.
- Mind the weight: Overloading leads to jerky movements; 70% of gym injuries stem from improper weight selection.