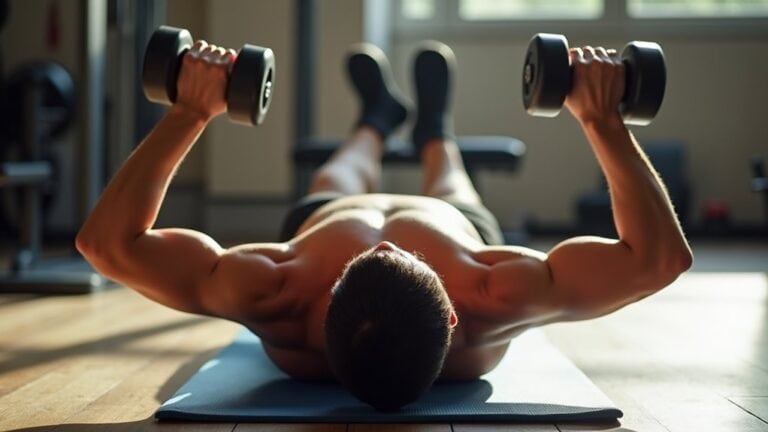
The resistance band chest press strengthens your chest, shoulders, and triceps with adjustable tension that fits your fitness level. Unlike weights, bands maintain resistance constant, helping you build muscle without straining joints studies show it can enhance strength by 30% in just eight weeks.
Anchor the band at chest height, press slowly, and keep your core engaged for control. Want to fine-tune your form or try variations for better results? There’s more to investigate.
Benefits of the Resistance Band Chest Press
The resistance band chest press is a revolutionary technique for building strength without weights. You’ll love how it engages your chest muscles through a full range of motion, something traditional weights can’t always match.
Unlike bench presses, the bands keep tension on your muscles the entire time, boosting muscle activation for better results.
Studies show resistance band exercises can increase strength by up to 30% in just 8 weeks, making them a sensible choice for home workouts.
Since the bands accommodate your strength level, you won’t risk overloading joints like with heavy dumbbells. The constant tension also helps improve control and stability, which is excellent should you be recovering from an injury or just starting out. Additionally, it’s portable-you can stash a band in your bag and train anywhere.
Whether you’re squeezing in a quick session or aiming for serious gains, this move delivers without the hassle of bulky equipment.
How to Set Up Your Resistance Band for Chest Press
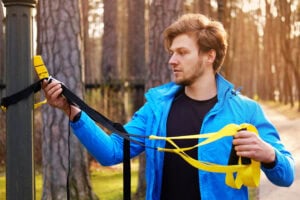
Start via choosing a sturdy anchor point behind you, like a door or pole, to secure your resistance band. Attach the band at chest height, making sure it’s tight enough to create tension but still lets you move comfortably.
Stand with your feet shoulder-width apart, facing away from the anchor, and grip the handles at chest level to prepare for the press.
Anchor Point Selection
- Door anchor: Secure it at chest height for balanced resistance.
- Pole or rack: Wrap the band around a stable vertical surface.
- Wall mount: Use a fixed hook when available.
- Floor anchor: Step on the band for a makeshift setup.
- Adjustability: Test different heights to find what feels best.
Keep it stable, and you’ll nail every rep.
Band Attachment Method
Once you’ve picked your anchor point, the next step is attaching the band securely for a chest press. Loop the band around a sturdy anchor-like a door, pole, or rack-at chest height. Make sure the band placement is even on both sides to avoid imbalance. For band positioning, hold one handle in each hand and step forward until you feel tension. Check the band isn’t twisted or frayed to prevent snapping mid-exercise.
| Band Setup Tip | Why It Matters |
|---|---|
| Anchor at chest height | Guarantees proper resistance |
| Equal band length | Prevents uneven muscle use |
| No twists or knots | Minimizes injury risk |
This setup keeps your chest press safe and effective, so you can focus on form.
Stance and Positioning
With your band securely anchored, it’s time to focus on your stance-because where you stand determines how well the exercise works. Start with a shoulder-width foot placement for balance, keeping one foot slightly forward when needed for stability. Position yourself far enough from the anchor point so the band has tension even at the start. Hold the handles at chest height, elbows bent and palms facing down. Your band positioning should feel natural, not forced, to avoid strain.
- Step back until the band is taut but not overstretched.
- Keep knees soft to absorb movement and protect your joints.
- Engage your core to maintain posture and control.
- Adjust band height if anchored low or high for even resistance.
- Check alignment-wrists, elbows, and shoulders should move smoothly.
This setup guarantees maximum effectiveness and safety.
Proper Form and Technique for Maximum Effectiveness
To get the most out of your resistance band chest press, you’ll want to focus on your form-because even small mistakes can make the exercise less effective or even strain your muscles. Keep your elbows slightly bent, not locked, and press the bands forward until your arms are almost straight. This guarantees proper muscle fiber activation and aids with muscular endurance development. Your shoulders should stay down, not hunched, to avoid unnecessary tension.
| Do This | Avoid This | Why It Matters |
|---|---|---|
| Keep elbows bent | Locking elbows | Protects joints |
| Press slowly | Rushing the motion | Builds control & strength |
| Engage your core | Arching your back | Prevents strain |
Breathe out as you press and inhale as you return. This rhythm keeps your movements smooth and steady. Ensure quality beats speed every time.
Variations of the Resistance Band Chest Press
You can switch up your resistance band chest press through trying the standing or seated version.
The standing press works your core while the seated one focuses more on your chest muscles.
Both variations keep your workout fresh and target different parts of your upper body.
Standing Chest Press
The standing chest press is one of the most effective resistance band exercises for building upper body strength, and it’s easy to modify for any fitness level. You’ll activate your chest, shoulders, and triceps while improving joint stability-key for everyday movements.
- Anchor the band at chest height behind you for proper tension.
- Maintain a shoulder-width stance to preserve balance.
- Push forward gradually, squeezing your chest muscles at full extension.
- Regulate the return to avoid snapping the band.
- Adjust resistance by stepping forward (harder) or back (easier).
This move mimics a bench press but with less strain on your joints. Approximately 85% of individuals report feeling stronger after 4 weeks of consistent training. Just keep in mind: technique matters more than pace. Should your shoulders hurt, reduce the band’s tension or examine your posture.
Seated Chest Press
When you’ve tried the standing chest press, the seated version presents a new challenge while maintaining the emphasis on your chest, shoulders, and triceps. Sit on a bench or chair, anchor the band behind you, and press forward like a weighted chest press, but with controlled resistance.
The seated position reduces momentum, forcing your muscles to work harder.
As an alternative, give a decline chest press a try by leaning back slightly-this shifts focus to your lower pecs.
Approximately 70% of people discover seated exercises gentler on their lower back, rendering it a prudent option should you require support. Keep your elbows slightly bent at the top to avoid strain. The resistance band’s tension builds as you press, giving you a full range of motion without heavy weights.
Common Mistakes to Avoid During the Exercise
Many people unintentionally rush through resistance band chest presses, sacrificing form for speed. This not only reduces effectiveness but also increases injury risk. To get the most out of your workout, avoid these common mistakes:
- Improper hand positioning: Gripping the band too wide or narrow shifts tension away from your chest, straining your shoulders instead.
- Overextending elbows: Locking them out at the top removes tension from your muscles, reducing gains.
- Ignoring muscle imbalances: Favoring one side can worsen uneven strength-focus on equal pressure from both hands.
- Slouching posture: Rounding your shoulders forward limits range of motion and strains your lower back.
- Using too much resistance: A band that’s too heavy forces you to compensate with momentum, cheating your muscles.
Incorporating the Chest Press Into Your Workout Routine
Since resistance band chest presses build strength without weights, you’ll want to weave them into your routine the correct way to maximize results. Start with adding them 2-3 times a week, alternating with other chest exercises to avoid overworking your muscles.
Adjust the workout intensity by choosing a band with the right tension-too light won’t challenge you, and too heavy can strain your form. Focus on controlled movements to boost muscle activation, squeezing your chest at the top of each press. Pair them with push-ups or dumbbell presses for a balanced routine.
Studies show resistance bands activate 70% of your chest muscles, making them just as effective as weights for building strength. Keep sessions short but intense, aiming for 3 sets of 10-12 reps. Listen to your body-if your muscles feel fatigued, take a day off to recover.
Choosing the Right Resistance Band for Your Fitness Level
- Check the color-coding: Most brands use colors to indicate resistance (e.g., yellow = light, red = medium, black = heavy).
- Test the stretch: A good band should challenge you without straining your form.
- Consider your goals: Building endurance? Go lighter. Strength? Choose heavier.
- Look for durability: Latex or fabric bands last longer than cheap alternatives.
- Adjust as you progress: Swap bands as exercises feel too easy.
About 70% of users stick with workouts longer when using the right resistance. Listen to your body it’ll tell you as exercises feel too easy.